
 I rescued this pretty little dressing table out of an alleyway near my house. This was over a month or so ago and I had been working on refinishing it for what felt like forever. It looked like the teenage girl that had it was messier with makeup than a bull in a china shop. The table top surface was scratched and scarred and it looked to me like it needed a little loving attention. Or rather a lot by the time I was finished with it. I gave it a complete made for TV makeover.
The little picture to the left is the only one I have of how it looked originally. I had already begun to sand the top surface by that point, which was the main damage area. I was intending to just paint that part at first, but I ended up going a whole lot further.
This thing evolved a few times since that point.
As you can see, it was a rich reddish cherry colour and…while it was nice, It really wasn’t my style at all. I would have struggled and fought to match it with anything I own.
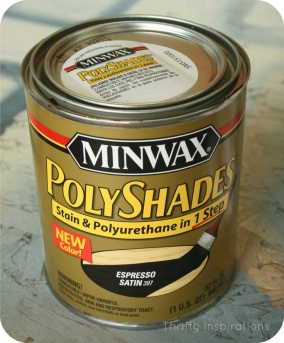
So I went to Home Hardware to look at staining and painting options. Eventually I settled on the 1 Step Minwax PolyShades. Being somewhat of a novice “refinisher” I wanted to try and make it as painless as possible…which didn’t end up working very well but I think any other product would have been ten times worse. This thing is pretty cheap too, I think I paid 10 dollars for it and I got the smaller can because I figured it would be just enough to get me through. If you’re doing a bigger project you’ll need the big can though because I just skimmed by with this. The colour I chose is the Espresso Satin finish. I had to go darker so that it would cover all that cherry-ness and I liked this rich brownish black so I dived right in and decided to go all the way with this thing. I think it was definitely worth it because it would have looked hokey with some of the other options I was cooking up. So all in all a pretty little dressing table for a whopping 15 or 20$ all things considered.
 First off I have to address something that was a huge struggle. The type of paintbrush. I don’t know why, maybe because this product is oil based, but you need to use a natural bristle brush. It can’t be made of anything synthetic because for some reason it reacts to the product and it will not produce the nice smooth texture we’re looking for. It just looks kinda bad.
Anything similar to the one on the left is perfect and you don’t even need an expensive one. I think I paid 3$ for the ones I was using from Wal-Mart and then threw them out after.


This is a picture of some parts sanded and the whole thing taken apart. I disconnected the mirror and the little cubicles and took out the drawers because I thought it would be easier to get everything painted nicely. That way none of the old colour would come peeking through at any point and I wouldn’t have to mess around taping stuff as much. I took off all of the hardware as well and put it in a ziplock bag so nothing got lost. (Expert tip).
I mostly just used regular sand paper to clean off the laquer type sealant that was originally on there. This is important because otherwise the Polyshades will just sit on top and it won’t be able to sink into the wood. You basically want to sand until the whole thing isn’t shiny any longer. Or at least in the areas you want to refinish.

Anything that I did have to tape, I used the green painter’s stuff, as you might expect. This extra step included around the mirror and some of the edges to get them crisp. I’ll go over that little bit later but I just used little pieces and worked my way around the frame so that any smudges wouldn’t wreck the mirror.
If you DO smudge it’s okay, there’s a way to fix it that I’ll talk about when we get there.
(Below) is a before and after of sanding and removing the knobs on the little drawers so that you can get a little bit of an idea of how far you need to take the sanding job. Again, just enough that it doesn’t shine any longer, you don’t have to sand your life away until you get rid of all of the previously stained colour. As long as you pick a darker shade, the Minwax will cover the rest.


Here’s just another little before and after (Left) of the cubicles that sit on the tabletop and support the mirror.
(Below) shows almost all of the parts completely sanded, aside from the mirror and drawers.

You may not be able to tell very well from the photos below, but it’s also important to test the Minwax first (or really any product) in a spot that isn’t visible. This is to make sure it doesn’t react weirdly with anything that is already on there and is also handy to test what ballpark the colour will end up in. As soon as all of that prep work was done I got down to business.


This post is separated into two segments. The prep, and the painting, just so that it makes it a little easier to digest.
The link to part two is here.
Happy prepping!

One thought on “Part one: The Prep”